Vented attics versus sealed attics

What are the practical differences?

When I start a new HERS rating or energy model the second conversation that typically comes up is the strategy for keeping the attic dry and mold free. Energy codes, building scientists and lots of bad experiences are collectively pushing us all towards sealed (AKA conditioned and unvented) attics. This means bringing the attic into the house, more like a very short second floor, so it is kept warm, and therefore dry, and therefore clean.

Please note that I am writing specifically about the region where we work- the mountains. Here it is a heating dominated climate; zones 5, 6 and 7. If we were talking about another climatic area the recommendations might be different.

What are the advantages of sealed attic construction?

•Whole house air leakage are typically significantly reduced which saves on heating and cooling energy, plus reduces ice damming
•Mechanical systems and ductwork located in a sealed attic operate more efficiently
•Controlled temperature and humidity increase structural integrity and decrease the possibility of condensation
•Increased temperature means decreased moisture which means decreased mold growth
•Rodents and insects are sealed out
•Increased home value or salability

Pros of building the sealed attic:

•no roof venting to install
•complex roof are inherently difficult to vent, sealing may be the solution
•may increase the usable area of a house; this could actually penalize a house under LEED-H
•air sealing the ceiling is not necessary
•attic hatches do not need to be insulated and gasketed
•recessed lights do not need to be air-tight
•creates a conditioned space for storage*

Cons of building the sealed attic:

•Increases the volume of air in the house that gets heated; this could actually penalize a house in an energy model
•The depth of rafters may limit the overall depth of the insulation
•Material expense. It takes air-impermeable insulation to create a sealed attic; which is typically more expensive than air-permeable insulation.**

The bottom line is that both of these techniques are still totally legitimate, they both have pros and cons, you just need to choose the on that serves you best for the particular application.

One more thing: back-ventilated roofing. If you find yourself in a situation where ice dams or dangerous shedding from a pitched roof are critical, over an entry for instance, it may behoove you to keep the roofing as cold as possible. Snow itself is an insulator- roughly R1 per inch. So if there is snow on a roof, the isolative value will begin to capture the small amount of heat escaping through the roof. If it gets warm enough to liquefy the snow, then conditions exist for ice build-up and/or avalanche-like releases of snow and ice. The cure for this is to provide ventilation channels behind the roofing to keep it cold. This is why I don’t like to use the terms “cold roof” and “hot roof”, it just gets confusing. The corollary to this idea is that sometimes it makes sense to insulate an exterior porch roof. I have seen this at a ski lodge before- you have a large entry porch on the south side, as heat builds up under the porch, the roofing is quickly warmed and thousands of pounds of snow and ice launch off of the roof with a terrifying crash. Again the answer is keeping the roofing cold; insulate it and/or back-ventilate it.

*If the attic will be used for storage, then foam insulation has to have a 15 minute thermal barrier; which may require installing ½” gypsum board or plywood. If it is not used for storage, then it just requires an ignition barrier; typically 1 ½” of mineral fiber insulation.
**Air permeable and impermeable insulation can be mixed to create a successful hybrid assembly. The ratio of the two is stipulated in the IRC table 806.4 by climate zone.

Vented crawl spaces versus sealed crawl spaces

What are the practical differences?

When I start a new HERS rating or energy model the first conversation that typically comes up is the strategy for keeping the crawl space dry and mold free. Energy codes, building scientists and lots of bad experiences are collectively pushing us all towards sealed (AKA conditioned or un-vented) crawl spaces. This means bringing the crawl space into the house, into the thermal envelope, more like a half-height basement, so it is kept warm, and therefore dry, and therefore clean.

Please note that I am writing specifically about the region where we work- the mountains. Here it is a heating dominated climate; zones 5, 6 and 7. If we were talking about another climatic area the recommendations might be different.

What are the advantages of sealed crawl space construction?

•Whole house air leakage are typically significantly reduced which saves money on heating and cooling while preventing unconditioned air from entering the home
•Mechanical systems and ductwork located in a sealed crawl space operate more efficiently
•Controlled temperature and humidity increase structural integrity and decrease the possibility of condensation
•Decreased moisture means decreased mold growth
•Odor elimination, better indoor air quality in general
•Less movement and buckling in hardwood floors due to even moisture levels year round
•Fewer rodents and insects living underfoot
•Increased home value or salability

What does this really mean to the builder?  Which is better? And at what cost? Pros of building the sealed crawl space:

•Insulation is placed on the walls instead of the floor above
•no penetrations to make between the crawl space and outdoors
•since the floor is no longer the pressure boundary- air sealing is not required
•crawl space hatches do not need to be insulated and gasketed
•Shared expenses with a Radon mitigation system
•creates a conditioned space for storage*

Potential cons of building the sealed crawl space:

•Increases the volume of air in the house that gets heated; this could actually penalize a house in an energy model
•A durable vapor barrier needs to be installed on ground
•Preferably the ground would be insulated too
•Conditioning mechanism needs to be installed, typically; passive vents, circulation fan, exhaust fan or a branch of the HVAC system
•May require the installation of ignition or thermal barrier*

As a designer and energy auditor, here’s my advice: make it a slab on grade if you can. If you cannot, because of soil conditions, topography or ground water, consider making it a full basement.** If you have to have a crawlspace, then make it completely open or make it completely sealed. It’s the typical in-between crawl space that is the real trouble. I could show you several really gross photos of what I have found in crawl spaces, living and dead, but maybe you will just take my word on this one. There is a whole industry developing around the idea of converting existing vented crawl spaces to conditioned crawl spaces. Check out www.coloradobasementsystems.com if you want to see the gross photos!
The main thing to take-away; vented crawl spaces don’t really work as promised. Unless the floor between the house and crawl space is totally sealed with polyurethane foam, then the building occupants will breathe some air from the crawl space. Breathing nasty crawl space air makes people sick.

Mark McLain
Architect & Sustainability Consultant

*If the conditioned crawl space will be used for storage, then foam insulation has to have a 15 minute thermal barrier; which may require installing ½” gypsum board or plywood. If it is not used for storage, then it just requires an ignition barrier; typically 1 ½” of mineral fiber insulation.

**Over the years I have heard many people say that building a full basement in lieu of a crawl space is so easy and cheap it should just be done automatically. That may be true in some cases, but consider the differences before taking that step. Is it legal to create the extra conditioned square footage? Legal stairs and hand rails will need to be constructed, with lighting. More soil will have to be moved. What else will be unearthed in that extra excavation? Of course we will need more concrete, steel, insulation and wall finishes, but also more outlets, lighting, heating, cooling and fresh air. These basement rooms are at least partially underground, what is the quality of that space? People general prefer not to spend a lot of time underground. If some of the rooms are sleeping rooms, then egress will have to be provided as well. The traditional “unfinished” basement is getting harder and harder to do. The building departments want to see these basements sealed up for safety and the lenders want to see real finished spaces ready to be lived in.

Completing a projected HERS Rating

RESNET

Here is a list of all of the data that needs to be put into a HERS energy model…

Geometry, location and orientation

  • CAD drawings in DWG or DXF format
  • Drawings in PDF format (or paper)
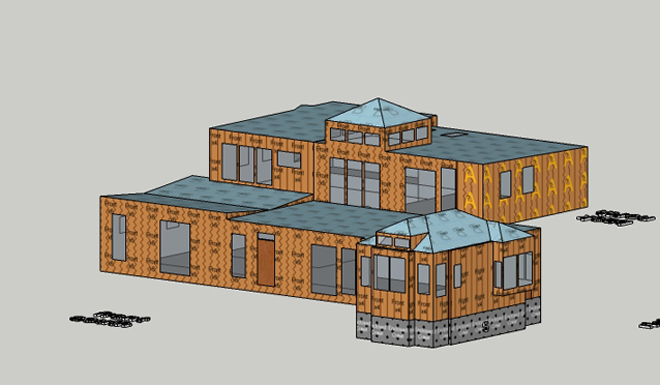
  • 3D model in SKP (SetchUp) format (optional but really helpful)

Ceiling/roof type

– Rafter

  • Vented
  • Unvented

– Attic

  • Vented (insulation on ceiling)
  • Sealed (unvented, insulation on roof sheathing)

Crawlspace type

  • Vented (passively or actively)
  • Conditioned
  • Open (on piers, not enclosed)

Sunspace (atrium, greenhouse)

  • None or detached
  • Attached but isolatable

Insulation location, type and levels

Insulation schedule or drawings that call-out all of the insulation location, types and levels.
Basement & crawlspace walls: top of concrete and finished grade line
Mass walls:
Skylites:
Ground under crawlspace or slab:
Rim board/band joists:
Above grade walls:
Windows:
Ceiling/roof:
Framing; standard or efficient?

Mechanical systems

Fuel source, type, size and efficiency of all machines

Mechanical distribution

Type, insulation level and location of ductwork

Infiltration rate and supplemental ventilation

Target air exchange rate
Mechanical ventilation rate, cycle period, wattage of fan
If a HRV or ERV is utilized, also need sensible and total recovery efficiencys

Lighting and appliances

Percentage of high-efficacy lighting (optional)
Consumption of appliances (optional)

Interior thermal mass

Area and thickness of supplementary thermal mass; divided into sun-strike and shaded areas

Renewable energy production

Thermal solar

  • Heating DHW only, or DHW plus space heating
  • Collector type
  • Collector area
  • Volume of water storage

Photovoltaic solar

  • Array area
  • Peak power production
  • Inverter efficiency

Ground Source Heat Pump

  • Well type; horizontal or vertical
  • Number of trenches/number of wells
  • Length of trenches/depth of wells
  • Flow rate

Registration information

Name, address, email, phone number of the project, owner and builder

Next steps

Remember to notify HERS rater to schedule an insulation inspection before it is covered. Rater will verify quantity and quality of insulation installation.
Remember to notify HERS rater to schedule the final inspection and test. Rater will verify specifications of mechanical equipment and renewable energy systems. Rater will perform blower door test and ductwork testing if required. Rater will upload HERS rating to the RESNET registry and then issue the confirmed certificate.

Energy model

How is a HERS Rating different from a REScheck?

The software used for HERS Ratings is much more sophisticated (and complicated). It can consider many more factors than can the software used for RESchecks. For instance, REScheck does not factor in air-infiltration, thermal mass, renewable energy production, etc.  into the energy calculations. These extra factors will lower the projected energy consumption. So a project that fails the energy code using REScheck may pass using a HERS rating.

HERS ratings must be performed by someone trained and certified. HERS raters have to; go to school, test to certify, carry liability insurance, annual quality assurance reviews, continuing education, purchase equipment, annual equipment calibration, software fees, vehicle travel to inspect and test, membership dues and pay a review fee of $65 per rating.